React Native Simulator Tips
Tips and Tricks for React Native iOS Simulator Developing
This will be a short post (mainly a list) of the things I found useful when developing a React Native application in iOS.
Let’s get started.
Debugging
As a React Native app isn’t run in the web browser like React is, remote JS debugging is accessed using cmd-D.
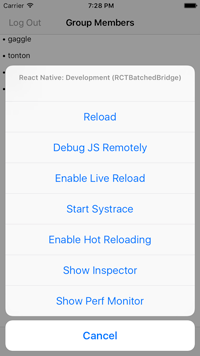
After pressing ‘Debug JS Remotely’, your browser will open and you can view the console (⌘⌥J) for debugging! All your React Native console.log()’s will appear here.
Live Reload and Hot Reloading
First off, if Live Reload is turned on, any write/save made to your project will cause the iOS simulator to refresh. This is helpful so you don’t have to constantly switch to the simulator and manually refresh with ⌘R.
The distinction between Live Reload and Hot Reloading is that Hot Reloading will attempt to refresh the simulator while staying at the current component or view. This is really useful for when you might be developing a component which is nested among layer and layer of other screens (such as beyond a login component and more). This allows you to instantly see changes without having to navigate manually from the initial route to the component you’re working on.
This comes with an important caveat: If you’re working on a new component function or state change, hot reloading may not reflect your changes. At those points, a manual reload is necessary. This is unfortunate but I personally still stick to defaulting to using Hot Reloading but manually refreshing as needed.
The Inspector
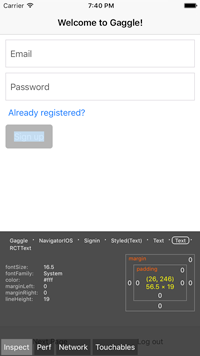
Finally, the last dev tool of React Native that is often used is the Inspector. This can be thought of as the mobile version of the Chrome browser’s inspect. Unfortunately, you won’t be able to see the exact lines of code here but it provides great CSS-like attribute descriptions and box-model border highlighting. This is great if you’re just getting started with flexbox, the styling method of React Native.